Master Tube Rigging Methods: A Complete Guide for Anglers
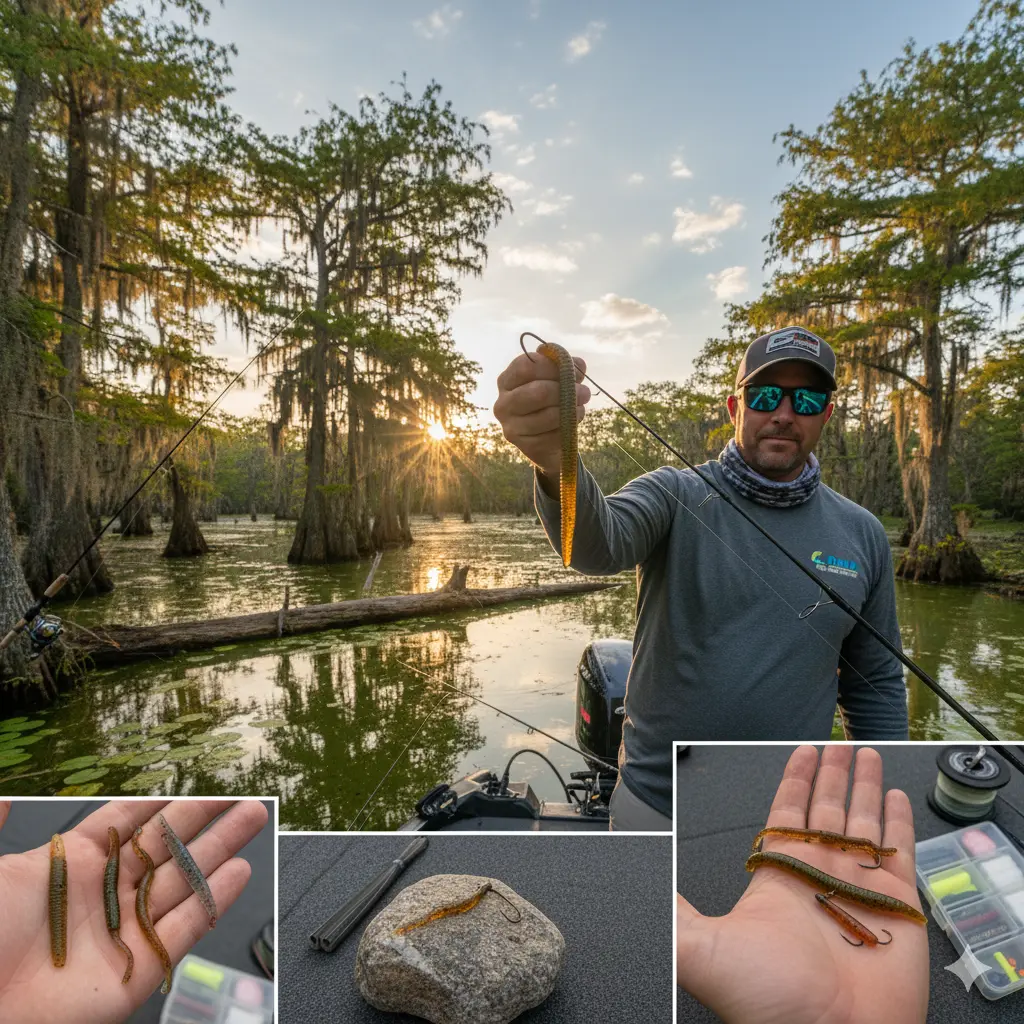
Ever stared at a wall of soft plastic baits and felt overwhelmed, only to grab the same old worm you always use? If you’re looking to add a truly versatile, fish-catching machine to your arsenal, it’s time to master the art of tube fishing. The secret isn’t just the bait itself, but the sophisticated yet simple tube rigging methods that bring it to life. These techniques unlock a bait that can be fished in virtually any depth or cover, mimicking everything from a darting baitfish to a crawfish scurrying along the bottom. This guide will break down everything from the fundamentals to advanced strategies, ensuring you know precisely how to rig a tube for maximum effectiveness.
Whether you’re a seasoned angler or just starting, understanding the nuances of these presentations can dramatically increase your catch rate. We will dive deep into the specific tube rigging methods that fool wary bass, from selecting the right components to executing the perfect presentation. Prepare to transform that simple, hollow-bodied piece of plastic into one of the most productive tools in your tackle box. This comprehensive guide provides the essential tube rigging tips you need for success on the water.
Table of Contents
- What is tube rigging methods?
- Key Benefits and Importance
- Complete Step-by-Step Guide
- Expert Tips & Best Practices
- Common Mistakes to Avoid
- Advanced Strategies for 2024/2025
- Essential Tools & Resources
- Frequently Asked Questions
What is tube rigging methods?
Tube rigging methods refer to the various techniques used to affix a hook and weight to a soft plastic, hollow-bodied tube lure. These methods are designed to optimize the bait’s unique spiraling, gliding action on the fall, which is highly attractive to predatory fish like bass.
Unlike simply threading a worm onto a hook, effective tube rigging involves specific components and steps to achieve the desired presentation, whether it’s weedless for thick cover or exposed for open water. Mastering these diverse tube rig setups and tube rigging techniques is fundamental to leveraging the lure’s full potential. This complete tube rigging guide will cover everything from choosing the right tube hooks and tube weights to understanding how different tube leaders affect the action. Understanding these tube rigging basics is the first step, as each piece of tube tackle plays a crucial role in the overall success of these proven tube rigging methods.
Key Components
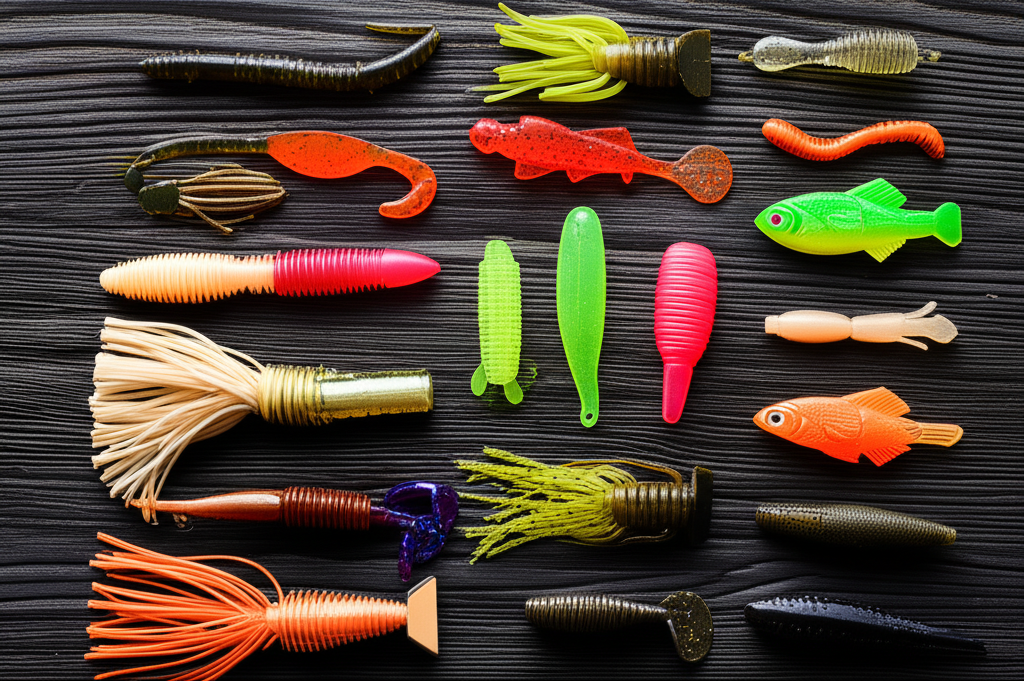
- The Tube Bait: A hollow, soft plastic lure with a tentacled skirt. Its design allows it to trap air, creating a slow, erratic, spiraling fall that mimics dying baitfish or fleeing crawfish.
- The Hook: Specialized tube hooks often feature a wide gap (EWG style) and a 60 or 90-degree line tie to ensure proper alignment and hook-up ratios. The hook is a critical part of all tube rigging methods.
- The Weight: Tube weights can be internal (inserted into the body) or external (like a Texas rig bullet weight). The weight’s placement and size dictate the lure’s fall rate and action.
- Line & Leader: The choice between fluorocarbon, monofilament, or braid, often combined with specific tube leaders, can impact visibility and the lure’s action in the water.
Why tube rigging methods Matters: Key Benefits
The primary advantage of mastering various tube rigging methods lies in their unparalleled versatility. A single tube bait can be adapted to perform effectively in a wide range of conditions, from shallow, weedy flats to deep, rocky ledges. This adaptability makes it a confidence bait for anglers year-round, consistently producing bites when other lures fail.
Ultimate Versatility in Presentation
With the right knowledge of tube rigging methods, an angler can make a tube imitate multiple types of forage. Rigged on a light internal jig head, it glides and spirals slowly, perfectly mimicking a dying shad. When rigged for flipping with a heavy Texas rig, it penetrates thick cover and hops along the bottom like a defensive crawfish. This ability to change the lure’s profile and action simply by altering the rigging is a significant strategic advantage. For example, an angler fishing a clear reservoir might use a light-line drop-shot tube, while another angler on a muddy river flips a bulky, dark-colored tube into log jams. It’s the same bait, transformed by two different tube rig setups.
Unmatched Natural Action
The hollow body is the tube’s secret weapon. As it sinks, it traps a pocket of air that is slowly released, creating a subtle bubble trail. More importantly, this design feature, combined with the tentacled tail, produces a unique, unpredictable spiraling action on a slack line. Fish, especially pressured smallmouth and largemouth bass, are often triggered by this non-mechanical, natural-looking descent. Proper tube rigging techniques are essential to preserve this signature action.
“The magic of a tube is in its fall. If your rigging kills that spiral, you’ve turned a fish-catcher into just another piece of plastic. Getting the details right is everything.”
Complete Guide to tube rigging methods – Step-by-Step
Among the most fundamental and effective tube rigging methods is the Texas rig. This weedless setup allows you to fish the tube in and around heavy cover like grass, wood, and rocks without constant snags. Here’s how to master this essential technique, a cornerstone of tube rigging basics.
Step 1: Select Your Tube Tackle
The first step is gathering the correct components. The synergy between the bait, hook, and weight is crucial for a successful presentation. This is the foundation of all solid tube rigging methods.
- Specific action item: Choose a tube bait between 2.5 and 4 inches. Select an extra-wide gap (EWG) hook sized to match your tube—typically a 3/0 or 4/0 hook is ideal for standard tubes.
- Required tools or resources: Your chosen tube, an EWG hook, and a bullet-style sinker (tungsten is preferred for its sensitivity and smaller profile).
- Expected outcome: You will have a perfectly matched set of tube tackle ready for rigging, ensuring the bait has the correct profile and action.
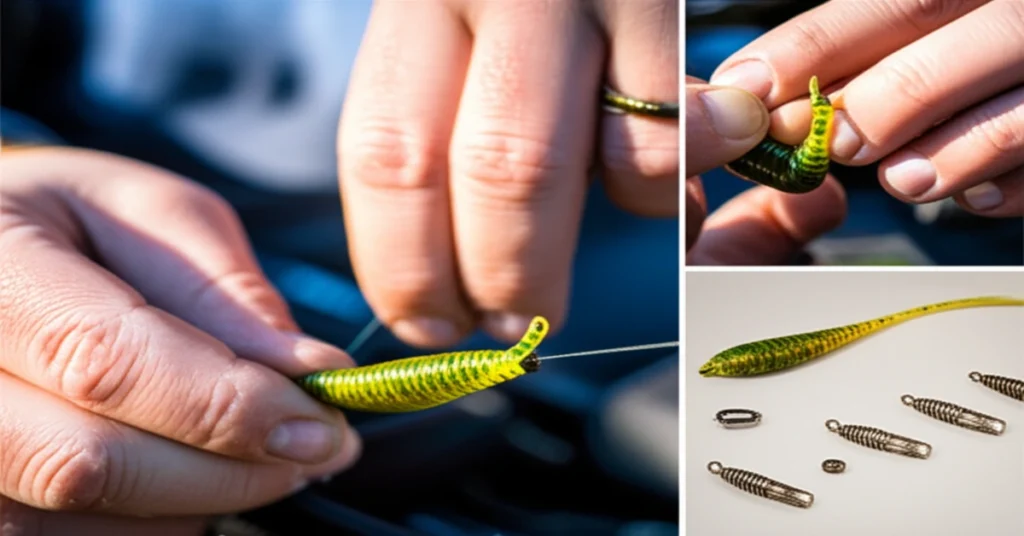
Step 2: Insert the Hook Point
Proper hook insertion is critical for a straight, natural-looking bait. Start by inserting the hook point directly into the center of the tube’s solid head. Push it in about a quarter of an inch and then exit the plastic through the side. This initial step sets the alignment for the entire rig.
Step 3: Secure the Hook and Go Weedless
After exiting the plastic, slide the tube up the hook shank and over the hook eye. Rotate the hook 180 degrees so the point is facing the tube’s body. Now, lay the hook alongside the tube to measure where the point should re-enter. Compress the tube slightly, insert the hook point through the hollow body, and push it all the way through. Finally, to make it perfectly weedless, pull the plastic slightly forward and bury the hook point back into the skin of the bait (a technique known as “skin-hooking”). This is one of the most important tube rigging tips for fishing heavy cover.
Expert Tips & Best Practices for tube rigging methods
Simply knowing how to assemble a rig isn’t enough; applying best practices separates the novice from the expert. Following these guidelines will enhance the effectiveness of your tube rigging methods and lead to more fish in the boat.
For Beginners:
- Start Light: When learning, use the lightest weight possible for your tube weights. This forces you to slow down and allows the tube’s natural spiraling action to shine. A 1/8 oz or 3/16 oz weight is a great starting point.
- Match the Hatch: Pay attention to the local forage. Use natural colors like green pumpkin, watermelon, and smoke in clear water to imitate baitfish and crawfish. In stained water, darker colors like black and blue provide a better silhouette.
- Add Scent: The hollow body of a tube is perfect for holding fish-attracting scent. Injecting a gel or paste scent not only masks human odors but can also make fish hold on longer, giving you more time to set the hook. This is a simple but powerful tip.
For Advanced Users:
- Master the Stupid Rig: For open water and sparse cover, try the “Stupid Rig.” This involves using a specialized tube jig head where the hook is exposed. Rig it by pushing the jig head all the way into the tube body until the eyelet pops through the plastic head. This setup gives the tube an incredible gliding and darting action on the fall.
- Power-Shotting a Tube: This is a beefed-up version of the drop-shot rig. Use a heavier weight (3/8 to 1/2 oz) and a stout 1/0 or 2/0 hook. This allows you to fish a tube vertically in deep water (25+ feet) with precision, keeping it in the strike zone for deep, suspended bass. It’s an advanced technique among modern tube rigging methods.
5 Common tube rigging methods Mistakes to Avoid
Success with these versatile baits often comes down to avoiding small but critical errors. Many anglers give up on tubes because they are making one of these common mistakes with their tube rigging methods, which severely hampers the lure’s effectiveness.
Mistake #1: Using the Wrong Hook
The Problem: Using a standard offset or worm hook can cause the tube to rig crookedly. This kills the bait’s natural spiral and leads to it spinning unnaturally on the retrieve, which can also cause severe line twist.
The Solution: Always use dedicated tube hooks or extra-wide gap (EWG) hooks. Their specific shape and 90-degree line tie are designed to keep the tube perfectly straight and allow for a much higher hook-up percentage when a fish bites.
Mistake #2: Over-weighting the Bait
The Problem: The single biggest appeal of a tube is its slow, tantalizing fall. Using excessively heavy tube weights makes the bait plummet straight down, completely negating its signature gliding and spiraling action.
The Solution: Use the lightest weight you can get away with while still maintaining bottom contact. In many situations, a 1/8 oz or 3/16 oz weight is plenty. Let the bait’s design do the work.
Mistake #3: Rigging a Crooked Bait
The Problem: If the hook is not inserted perfectly straight through the head and body, the tube will spin and helicopter on the retrieve instead of gliding. This looks unnatural to fish and is a common failure in tube rigging basics.
The Solution: Take your time during rigging. After inserting the hook, hold the rig up and ensure the tube hangs perfectly straight. If it’s crooked, re-rig it. A straight rig is non-negotiable for proper action.
Mistake #4: Not Using a Leader in Clear Water
The Problem: Tying braided line directly to your tube in clear water can spook line-shy fish. While braid offers great sensitivity and strength, its high visibility is a major drawback in clear conditions.
The Solution: Always use tube leaders made of fluorocarbon in clear to moderately stained water. A 6- to 10-foot fluorocarbon leader (8-12 lb test) tied to your braided main line provides invisibility near the lure while retaining the benefits of braid.
Mistake #5: An Aggressive, Unnatural Retrieve
The Problem: Many anglers work a tube like a standard Texas-rigged worm, with big hops and fast movements. This can be effective at times, but it often works against the tube’s subtle, natural appeal.
The Solution: Let the bait work for you. Employ a slow drag, a series of short hops, or even just let the bait sit still (dead-sticking). Most bites on a tube come when it’s on the fall or sitting motionless on the bottom.
Advanced tube rigging methods Strategies for 2024/2025
As fish become more pressured, innovative rigging techniques are essential for staying ahead. These cutting-edge tube rigging methods offer unique presentations that savvy fish haven’t seen, giving you a distinct advantage in 2024 and beyond.
The Free Rig Tube
Originating from Japan, the Free Rig is one of the most effective new tube rigging techniques. It involves threading your line through a specialized drop-shot style weight with a large ring, then tying on your hook. On the cast, the weight pulls the bait down quickly. However, once it hits the bottom, the weight separates from the bait, allowing the tube to fall slowly and naturally behind it on a slack line. This separation gives the tube an incredibly natural, weightless action that is deadly on finicky bass. It provides a faster sink rate to get into the strike zone but presents the bait in the most subtle way possible.
The Bladed Jig (ChatterBait) Trailer
While craws and swimbaits are common trailers, a tube offers a unique profile on the back of a bladed jig. Rig a 3.5-inch tube horizontally on the hook so the tentacles flare out to the sides. This rigging method adds bulk and creates a different vibration and water displacement pattern than standard trailers. The tube’s subtle tail action complements the violent shake of the blade, providing a larger, more enticing target for aggressive bass, especially in stained water. This is an excellent way to adapt your tube tackle for power fishing scenarios.
Essential Tools & Resources for tube rigging methods
Having the right gear can make all the difference in executing these techniques properly. This curated list of tools and resources will help you master various tube rigging methods and get the most out of your time on the water.
Recommended Tools:
- Owner Tube Hooks: These hooks feature a short shank, wide bite, and a unique Z-bend at the eye (Keeper) that holds the head of the tube securely. They are specifically designed for this application and are a top choice among pros.
- Tungsten Tube Weights: Both internal and external tube weights made from tungsten offer a huge advantage. They are smaller and denser than lead, providing better sensitivity to feel subtle bites and changes in bottom composition.
- Scent Injector Needle: A simple plastic syringe with a needle tip allows you to precisely inject gel or liquid fish attractant deep into the hollow cavity of the tube, ensuring it lasts longer and disperses a potent scent trail.
Additional Resources:
- This Tube Rigging Guide: Bookmark this page! We continuously update it with the latest tube rigging techniques and tube rigging tips to keep you at the top of your game.
- YouTube Angling Channels: Visual learning is powerful. Channels like TacticalBassin’ and Flukemaster provide excellent, detailed videos on various tube rig setups and how to fish them effectively.
Frequently Asked Questions About tube rigging methods
Q1: What are the most effective tube rig setups for different conditions?
Answer: The best setup depends entirely on the environment. For heavy grass or wood cover, a classic Texas rig is unbeatable for its weedless properties. In open water or for suspended fish, a tube on a drop-shot rig or an internal jig head excels. For dragging on deep, rocky bottoms, a Carolina rig keeps the tube floating just above the bottom, looking natural. Understanding these core tube rig setups is a key part of this tube rigging guide and will prepare you for any situation. Your choice of tube hooks and tube weights will vary for each of these tube rigging techniques.
Q2: How do I choose the right size and color for my tube bait?
Answer: A great rule of thumb is “match the hatch.” If you’re fishing in clear water where bass are feeding on small baitfish, a 2.5-3 inch tube in a translucent or natural shad color is perfect. If you’re in a lake known for large crawfish, a 4-inch tube in green pumpkin, brown, or black with blue flakes is a better choice. Start with natural colors and only switch to bright colors like white or chartreuse in very muddy water or for specific situations.
Q3: Can I use a tube for saltwater fishing?
Answer: Absolutely! Tube baits are incredibly effective for a variety of inshore saltwater species. Rigged on a jig head, they perfectly imitate shrimp and small crabs. Species like speckled trout, redfish, and flounder will readily attack a tube hopped along the bottom of a grassy flat or oyster bar. Just be sure to use saltwater-grade hooks to prevent corrosion.
Q4: What is the simplest way to start with tube rigging basics?
Answer: The easiest and one of the most effective methods is rigging a tube on a simple internal tube jig head. You just insert the jig head into the hollow body until the eye of the hook pops out through the plastic at the head. This setup is not weedless, so it’s best for open water or sparse cover, but it imparts an incredible darting and spiraling action that is easy for beginners to fish effectively. It’s a fantastic starting point for learning the feel of a tube bite.
Conclusion: Master tube rigging methods for Long-term Success
The tube is far more than a simple piece of plastic; it’s a highly adaptable system that, when paired with the correct tube rigging methods, can consistently outperform more complicated and expensive lures. From its signature spiral on the fall to its ability to mimic a wide array of forage, the tube has earned its permanent place in the tackle boxes of professional and amateur anglers alike. By understanding the core principles of rigging, you unlock its full fish-catching potential.
As you move forward, continue to experiment and refine your approach. The future of angling will always favor those who master the fundamentals and adapt them with innovative strategies. By applying the knowledge from this tube rigging guide—from tube rig setups and tube hooks to advanced tube rigging techniques—you are well-equipped to catch more fish in more situations. Grab your tube tackle, practice these methods, and get ready to experience a new level of fishing success.
Related Articles You Might Find Helpful:
- The Ultimate Guide to Tube Rig Setups and Tackle
- 5 Finesse Fishing Techniques That Will Change Your Game
- How to Choose the Right Soft Plastic Bait for Any Condition
What’s Your tube rigging methods Experience?
What is your go-to tube color or your favorite way to rig it? Share your most effective tube rigging tips or success stories in the comments below—we’d love to hear what works for you!
Note: This guide reflects current best practices and is updated regularly to ensure accuracy. Last updated: [Current Date]