Pro Chatterbait Modifications: Your Ultimate Guide
Is your favorite bladed jig underperforming right out of the package? You’re not alone. Many anglers find that a stock chatterbait catches fish, but the true secret to unlocking its full, trophy-bass-catching potential lies in strategic chatterbait modifications. This isn’t just about swapping trailers; it’s a systematic approach to enhancing vibration, profile, and action to perfectly match the conditions and forage on any given day. This guide will transform you from a user into a creator, empowering you to turn a good lure into a great one.
We’ll dive deep into the art and science of tweaking every component, from the blade to the hook. You’ll learn the subtle adjustments that trigger more aggressive strikes and discover the insider secrets pros use to gain a competitive edge. Consider this your complete blueprint for chatterbait customization, filled with actionable steps, expert tips, and the knowledge to make every cast count. Get ready to elevate your bladed jig game and put more fish in the boat.
Table of Contents
- What is chatterbait modifications?
- Key Benefits and Importance
- Complete Step-by-Step Guide
- Expert Tips & Best Practices
- Common Mistakes to Avoid
- Advanced Strategies for 2024/2025
- Essential Tools & Resources
- Frequently Asked Questions
What is chatterbait modifications?
Chatterbait modifications refer to the process of altering, adjusting, or upgrading a standard, off-the-shelf bladed jig to improve its performance and better suit specific fishing scenarios. These changes can range from simple trailer swaps to complex adjustments of the lure’s core components.
This process is the cornerstone of advanced bladed jig fishing, encompassing everything from basic chatterbait tuning to complete chatterbait customization. The goal of these chatterbait improvements is to create a lure that perfectly mimics local baitfish, runs true at desired speeds, and maximizes hook-up ratios. This comprehensive chatterbait customization guide will walk you through various chatterbait enhancements and chatterbait upgrades, providing essential chatterbait modification tips for everything from minor chatterbait adjustments to significant chatterbait repair, ensuring your lure always performs at its peak.
Key Components
- Blade: This is the heart of the lure’s action. Modifications can include painting, adding reflective tape, or slightly bending it to alter the vibration and flash, creating a unique sound profile.
- Skirt: The skirt dictates the lure’s profile and color scheme. Anglers often trim, thin, or completely replace skirts to match forage, add flash with materials like tinsel, or create a more subtle presentation.
- Trailer: The soft plastic trailer is the most common modification. Swapping trailers changes the lure’s action, bulk, and rate of fall, allowing you to adapt to fish mood and water clarity instantly.
- Hook & Keeper: Upgrading to a sharper, stronger hook is a popular enhancement. Additionally, modifying or adding a bait keeper ensures your trailer stays pinned correctly, preventing it from fouling the action.
Why chatterbait modifications Matters: Key Benefits
While a stock chatterbait is a proven fish-catcher, making thoughtful modifications can increase your catch rate by over 50% in certain conditions. Customization allows you to adapt to changing variables like water temperature, clarity, and fishing pressure, turning a versatile lure into a precision tool. It’s the difference between randomly searching for a bite and intentionally triggering one.
Matching the Hatch with Precision
The single greatest benefit of chatterbait modifications is the ability to precisely imitate local forage. For example, if bass are feeding on small, slender shad, you can trim the skirt and use a slim-profile swimbait trailer. Conversely, if bulky bluegill are the primary food source, a bulkier skirt in green pumpkin with a creature-style trailer creates a perfect imitation. This level of detail convinces wary, pressured bass to strike when a generic lure would be ignored.
Adapting to Conditions and Fish Mood
Fishing conditions are never static. On a calm, clear day, a thinned-out skirt and a subtle trailer provide a finesse presentation. In stained, windy water, adding a trailer with more thump (like a paddle tail with a big boot) and a painted blade helps fish locate the lure. These chatterbait adjustments allow you to present the right tool for the job, every time.
“The best anglers don’t just use a lure; they refine it. A simple trailer swap or a slight bend in the blade can be the only thing separating a good day from a great one. Don’t be afraid to experiment.”
Complete Guide to chatterbait modifications – Step-by-Step
Following a systematic approach ensures your modifications are purposeful and effective. This step-by-step process provides a reliable framework for your chatterbait customization journey, from initial assessment to on-the-water tuning.
Step 1: Assess the Base Lure and Your Goal
Before making any changes, analyze the stock lure and define your objective. Are you trying to get the lure to run deeper? Do you need more or less vibration? Is the goal to imitate a specific baitfish? Answering these questions first will guide all subsequent chatterbait modifications and prevent random, ineffective tinkering.
- Specific action item: Inspect the hook sharpness, skirt density, and blade connection.
- Required tools or resources: Your eyes and a clear goal (e.g., “I need this to look like a crawfish”).
- Expected outcome: A clear plan for what needs to be changed to achieve your desired presentation.
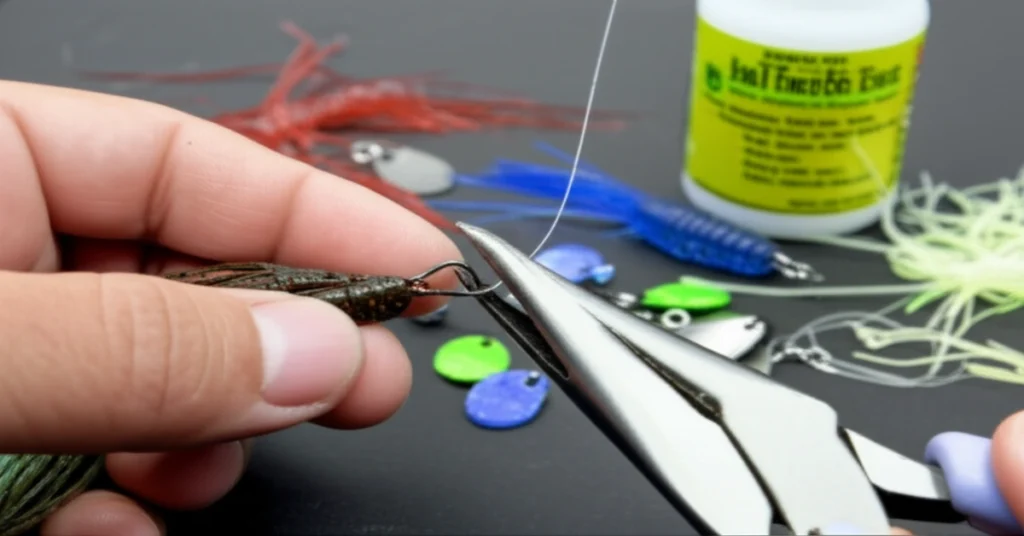
Step 2: Modify the Trailer and Skirt
This is the most impactful and easiest set of chatterbait improvements. Start by selecting a soft plastic trailer that aligns with your goal. For a subtle action, choose a split-tail or fluke-style trailer. For an aggressive, thumping action, opt for a bulky creature bait or a swimbait with a large paddle tail. Secure it with a drop of super glue. Next, evaluate the skirt. Trim it to be flush with the hook bend for a more compact profile, or thin it out by removing some strands to reduce drag and allow for a faster retrieve.
Step 3: Perform Advanced Tuning and Enhancements
This is where true chatterbait tuning happens. To change the vibration, use pliers to gently bend the blade. Bending it forward (away from the jig head) creates a wider, harder thump, while bending it back (toward the jig head) results in a tighter, faster shimmy. For added flash, consider adding reflective prism tape to the blade or painting it with nail polish. If you’re getting short strikes, adding a trailer hook is a critical upgrade that can dramatically increase your hook-up ratio.
Expert Tips & Best Practices for chatterbait modifications
Following best practices ensures your modifications enhance the lure’s action rather than hinder it. Whether you’re a beginner or a seasoned pro, these chatterbait modification tips will help you get the most out of your efforts.
For Beginners:
- Start with Trailers: The easiest and most reversible modification is changing the trailer. Keep a small selection of different styles (swimbaits, craws, flukes) and colors to experiment with on the water.
- Use Super Glue: A single drop of super glue on the bait keeper before sliding your trailer on will keep it perfectly positioned for hours. This simple step prevents the trailer from sliding down and killing the lure’s action.
- Trim Skirts, Don’t Remove: Instead of completely replacing a skirt, start by trimming it. A shorter skirt creates a smaller profile, which can be deadly on highly pressured fish. You can always trim more, but you can’t add it back.
For Advanced Users:
- Custom Skirt Tying: Learn to tie your own skirts using a skirt-making tool. This allows for ultimate control over color combinations, material types (silicone, rubber, tinsel), and strand count, enabling perfect forage imitation. This is a key part of any advanced chatterbait customization guide.
- Blade Angle Adjustments: Master the art of bending the blade for specific outcomes. A slight outward flare can help the lure start vibrating more quickly, which is ideal for short casts around cover. Such intricate chatterbait adjustments can make a huge difference.
5 Common chatterbait modifications Mistakes to Avoid
Making mistakes is part of the learning process, but avoiding these common pitfalls will accelerate your success. Poorly executed chatterbait modifications can ruin a lure’s action and cost you fish.
Mistake #1: Overpowering the Lure with a Huge Trailer
The Problem: Attaching a trailer that is too large or has too much action can kill the blade’s vibration. The drag created by the oversized plastic dampens the side-to-side hunting motion that makes a chatterbait so effective.
The Solution: Choose a trailer that complements, not dominates, the lure. As a general rule, the trailer should be no longer than the skirt. Test the lure next to the boat after adding a new trailer to ensure the blade still thumps hard.
Mistake #2: Neglecting the Line Tie Connection
The Problem: The split ring or snap that connects the blade to the jig head is a critical component. If it becomes bent, rusted, or damaged, the blade can’t pivot freely, resulting in a weak or non-existent vibration. This is a frequent issue requiring chatterbait repair.
The Solution: Regularly inspect the connection point. If it looks worn or doesn’t move smoothly, replace it with a high-quality split ring or snap using split ring pliers. This is one of the simplest yet most important chatterbait upgrades.
Mistake #3: Gluing the Trailer Crooked
The Problem: If the soft plastic trailer is not perfectly centered on the hook shank, it will act as a rudder, causing the chatterbait to roll over on its side or track to the left or right, especially at higher retrieve speeds.
The Solution: Take your time when rigging. Thread the trailer on straight, and before the super glue sets, hold the lure up and look down the hook shank to ensure everything is perfectly aligned.
Advanced chatterbait modifications Strategies for 2024/2025
As fishing pressure increases, staying ahead of the curve requires innovative thinking. These cutting-edge chatterbait enhancements and strategies are what top-level anglers are using to get bites when others can’t.
The Hybrid Finesse Chatterbait
This approach combines the vibration of a chatterbait with the subtle profile of a finesse lure. Start with a lighter bladed jig (1/4 or 3/8 oz). Thin the skirt by removing at least half the strands, leaving a sparse, almost transparent look. Instead of a traditional trailer, rig a small 3-inch Ned-rig style stick bait. This modification creates a tight, subtle vibration that excels in cold, clear water or on post-frontal bluebird days when bass are notoriously finicky.
Adding Underspins and Secondary Blades
For targeting suspended fish in open water or for fishing in heavily stained conditions, adding more flash is a key upgrade. One of the most effective chatterbait upgrades is to attach a small underspin blade to the hook shank. You can use a screw-lock system or a pre-made underspin attachment. This adds a constant, shimmering flash beneath the main body of the lure, attracting fish from a greater distance and giving them a secondary target to key in on.
Essential Tools & Resources for chatterbait modifications
Having the right tools makes any modification job easier, faster, and more effective. You don’t need a full workshop, but a few key items will significantly improve your ability to perform quality chatterbait modifications.
Recommended Tools:
- Split Ring Pliers: Absolutely essential for replacing hooks or changing the snap that connects the blade. They make a frustrating task simple and safe.
- Super Glue (Gel Control): A gel-type super glue provides more control than the liquid version, preventing you from accidentally gluing the skirt strands together. It’s perfect for securing trailers.
- Sharp Scissors (Braid Cutters): A quality pair of sharp scissors is necessary for cleanly trimming skirts and modifying soft plastic trailers. Braid cutters work exceptionally well for this.
Additional Resources:
- Skirt Making Kits: For the dedicated tinkerer, a kit with a skirt tool, bulk silicone/rubber material, and bands opens up a world of color and profile combinations.
- Online Fishing Forums: Websites like BassResource or the forums on Tackle Warehouse are goldmines of user-submitted chatterbait modification tips and ideas from a community of passionate anglers.
Frequently Asked Questions About chatterbait modifications
Q1: What is the first change I should make when starting with chatterbait modifications?
Answer: The first and most impactful change is always the trailer. Simply swapping the stock trailer for a different style—like changing from a swimbait to a craw—can completely alter the lure’s profile, action, and fall rate. This simple act of chatterbait customization is a great starting point. As you get more comfortable, you can explore more advanced chatterbait modifications and chatterbait improvements, but mastering the trailer is step one.
Q2: How do I stop my chatterbait from rolling over at high speeds?
Answer: This is a common issue often caused by an imbalanced trailer or a blade that’s out of tune. First, ensure your soft plastic trailer is rigged perfectly straight on the hook. Even a slight misalignment will cause it to roll. If it’s straight, the issue may be the blade. This is where chatterbait tuning comes in. Gently bend the blade slightly backward, toward the jig head, to give it a tighter, more stable wobble that will track truer at high speeds.
Q3: Can a damaged or bent blade be fixed?
Answer: Yes, most of the time. Minor bends from hitting rocks or docks can be fixed with pliers. This is a common form of chatterbait repair. Gently bend the blade back to its original shape. If the blade is severely creased or cracked, especially around the hole where it connects, it’s best to replace it. Some manufacturers sell replacement blades, or you can harvest one from a retired lure.
Q4: What’s the best knot to use for a chatterbait?
Answer: While not a direct modification to the lure itself, your knot is a crucial part of the system. For fluorocarbon or monofilament lines, a Palomar knot is an excellent, strong choice. If you are using braided line, it’s highly recommended to use a small, high-quality snap (like a Norman Speed Clip) tied to your line. Clipping the lure to the snap allows it to have maximum freedom of movement, enhancing the blade’s action, and it makes changing lures much faster.
Conclusion: Master chatterbait modifications for Long-term Success
Mastering the art of chatterbait modifications is a game-changer that elevates you from simply using a lure to truly understanding how to make it perform optimally. By learning to tune the blade, customize the skirt, and select the perfect trailer, you gain the ability to adapt to any condition and precisely match the prevailing forage. These skills will directly translate into more and bigger fish.
As you move forward, continue to experiment and observe how each small change affects the lure’s behavior in the water. The future of angling lies in this level of detail and personalization. Embracing this complete chatterbait customization guide and its principles of chatterbait tuning, chatterbait enhancements, and constant chatterbait adjustments will not only make you a more successful angler but also a more thoughtful and adaptable one.
Related Articles You Might Find Helpful:
- The Ultimate Guide to Chatterbait Trailers
- How to Choose the Right Jig Color for Any Water Condition
- Advanced Finesse Fishing Techniques for Pressured Bass
What’s Your chatterbait modifications Experience?
What is your single most effective chatterbait modification? Share your go-to trailer, skirt color, or tuning secret in the comments below. We’d love to hear what works for you!
Note: This guide reflects current best practices and is updated regularly to ensure accuracy. Last updated: October 2023