
Master Live Bait Rigging: A Complete Guide
There’s nothing more frustrating than watching your bobber sit motionless, knowing there are fish just below the surface ignoring your offering. The secret to turning a slow day into an unforgettable fishing trip often lies in one fundamental skill: mastering live bait rigging. This timeless angling art form is about more than just putting a worm on a hook; it’s a strategic approach to presenting bait in the most natural, irresistible way possible. This comprehensive guide will transform your understanding, taking you from the fundamentals to advanced strategies, ensuring your bait looks and acts like an easy meal that predator fish can’t refuse.
Whether you’re chasing walleye in a deep lake, stalking bass along a weed line, or targeting saltwater species, the principles of effective live bait rigging are universal. We will break down everything you need to know, from selecting the right tackle to executing flawless presentations. You’ll learn the subtle differences in techniques that separate novice anglers from seasoned experts, giving you the confidence to adapt to any condition and consistently catch more fish. Get ready to elevate your angling game.
Table of Contents
- What is live bait rigging?
- Key Benefits and Importance
- Complete Step-by-Step Guide
- Expert Tips & Best Practices
- Common Mistakes to Avoid
- Advanced Strategies for 2024/2025
- Essential Tools & Resources
- Frequently Asked Questions
What is live bait rigging?
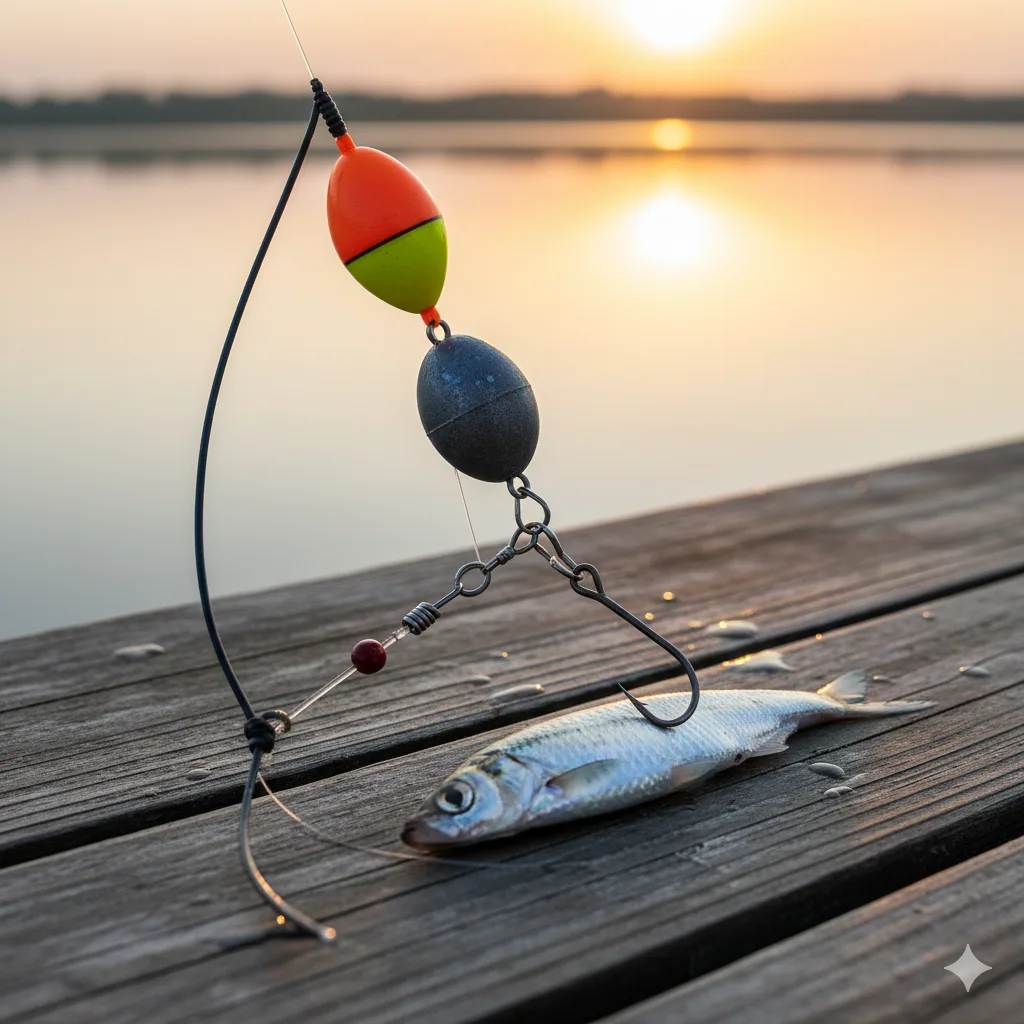
Live bait rigging is the method of assembling hooks, weights, leaders, and other terminal tackle to present live bait to fish in a way that maximizes its natural movement and appeal. It’s the critical link between your line and the fish, designed to fool even the wariest predators.
At its core, this practice involves understanding how different components work together. A complete mastery of various live bait rig setups allows an angler to adapt to water depth, current, and the target species’ feeding habits. This comprehensive live bait rigging guide explores different live bait rigging techniques, from the selection of specific live bait hooks and live bait weights to the construction of effective live bait leaders. Understanding these live bait rigging basics is the foundation for employing more complex live bait rigging methods and choosing the right live bait tackle for any situation.
Key Components
- Hook: The most critical point of contact. The right hook secures the bait without killing it, ensuring a solid hookset when a fish strikes. Common types include J-hooks, circle hooks, and octopus hooks.
- Leader: A section of line, often fluorocarbon or monofilament, that connects the hook to the main line. It provides abrasion resistance and can be nearly invisible to fish, enhancing the stealth of your presentation.
- Sinker/Weight: This component gets your bait down to the strike zone. The type and size of the weight—from tiny split-shot to heavy egg sinkers—are crucial for controlling the depth and action of the bait.
- Swivel: A small but vital piece of tackle that connects the main line to the leader. It prevents line twist, a common issue with live bait rigging that can weaken your line and ruin your presentation.
Why Live Bait Rigging Matters: Key Benefits
In a world of advanced lures and electronics, the art of live bait rigging remains one of the most effective ways to catch fish. Its power lies in its ability to tap into the fundamental, predatory instincts of fish. A perfectly presented live bait sends out all the right signals—scent, vibration, and visual cues of distress—that trigger an aggressive feeding response that artificial lures can struggle to replicate.
Ultimate Natural Presentation
The primary benefit of proper live bait rigging is creating a presentation that is indistinguishable from a fish’s natural prey. For example, when rigging a live minnow for walleye, using a light wire hook through the lips and a long leader on a slip-sinker rig allows the bait to swim freely and frantically just above the bottom. This perfectly mimics a distressed baitfish, an easy meal a predator like a walleye is biologically programmed to attack. No crankbait or soft plastic can perfectly replicate that authentic, panicked movement.
Unmatched Versatility and Effectiveness
Mastering a few key live bait rig setups opens up a world of possibilities. The same basic slip-sinker rig can be adapted for countless species and situations. You can use it with a leech for smallmouth bass on a rocky point, a shiner for largemouth on a weed edge, or a shrimp for redfish on a tidal flat. By simply changing your live bait hooks, leader length, or weight, you can fine-tune your approach for deep water, fast currents, or finicky, light-biting fish. This adaptability makes it a go-to technique for anglers year-round.
“The best anglers don’t just know a dozen rigs; they know why one rig works better than another in a specific situation. That’s the essence of successful live bait rigging.”
Complete Guide to Live Bait Rigging – Step-by-Step
Building an effective rig is a straightforward process when you break it down into manageable steps. Here, we’ll walk through creating one of the most versatile and popular setups: the Slip-Sinker Rig (also known as a Carolina Rig in some circles). This is one of the fundamental live bait rigging methods every angler should know.
Step 1: Assemble Your Live Bait Tackle
Before you start tying, gather all the necessary components. A well-organized tackle box is your best friend. This systematic approach is a core principle of good live bait rigging.
- Required Tools/Resources: Main fishing line (on your rod/reel), an egg sinker (1/4 to 1/2 oz is a good start), a small plastic bead, a barrel swivel, leader material (fluorocarbon is ideal), and your chosen live bait hooks.
- Specific Action Item: Lay out each component in the order you will assemble it. This prevents mistakes and speeds up the process on the water.
- Expected Outcome: You will have all the necessary parts ready for a quick and efficient assembly.
Step 2: Thread the Components and Tie the Swivel
This is where the rig takes shape. Take the end of your main line coming from your fishing rod. First, slide the egg sinker onto the line. Second, slide the plastic bead on after the sinker. The bead protects your knot from being damaged by the sliding sinker. Finally, tie your main line to one end of the barrel swivel using a reliable knot like an Improved Clinch Knot. Your sinker should now slide freely on the main line above the swivel.
Step 3: Attach the Leader and Hook
The final step is creating the connection to your bait. Cut a length of your leader material—18 to 36 inches is a standard starting point for many live bait leaders. Tie one end of the leader to the open end of the barrel swivel. Tie your hook to the other end of the leader. Your slip-sinker rig is now complete. You can attach your chosen bait, and the rig will allow it to swim naturally while the weight keeps it in the strike zone.
Expert Tips & Best Practices for Live Bait Rigging
Following a few key principles can dramatically increase your success rate. These essential live bait rigging tips separate anglers who get lucky from those who consistently produce. The goal is always to maximize bait vitality and presentation.
For Beginners:
- Start with the Basics: Don’t try to learn ten different rigs at once. Master the slip-sinker rig and the split-shot rig. These two fundamental live bait rig setups will cover 90% of your freshwater fishing needs and teach you the core live bait rigging basics.
- Match Hook Size to Bait: A common error is using a hook that’s too large. A giant hook will kill your bait quickly and look unnatural. The goal is to use the smallest, lightest hook you can get away with that still provides enough strength and a good hook-up ratio.
- Check Your Bait Often: Don’t just cast out and wait for an hour. Reel in every 10-15 minutes to ensure your bait is still alive and kicking. If it’s dead or lethargic, replace it immediately. A lively bait is a hundred times more effective.
For Advanced Users:
- Vary Leader Length: The length of your live bait leaders is a critical variable. In clear water or for wary fish, use a longer leader (4-6 feet) to put more distance between your bait and the weight. In stained water or around heavy cover, a shorter leader (18-24 inches) provides better control and accuracy.
- Embrace Fluorocarbon: While monofilament works, switching to a fluorocarbon leader can be a game-changer. It is virtually invisible underwater and is more abrasion-resistant than mono, offering a stealthier and more durable presentation—a key advanced live bait rigging strategy.
5 Common Live Bait Rigging Mistakes to Avoid
Even small errors in your live bait rigging can be the difference between a full livewell and going home empty-handed. Avoiding these common pitfalls is crucial for consistent success and will improve your application of all live bait rigging techniques.
Mistake #1: Using the Wrong Hook for the Job
The Problem: Using a J-hook when a circle hook is better, or a hook that is too thick or heavy. This can lead to gut-hooked fish, poor hook-up ratios, and bait that dies quickly.
The Solution: Use circle hooks when fish are aggressively taking the bait to ensure a clean hookset in the corner of the mouth. Use fine-wire octopus or J-hooks for delicate baits like leeches or for light-biting fish where a quick, manual hookset is required.
Mistake #2: Impeding the Bait’s Natural Action
The Problem: Hooking the bait in a way that restricts its movement or kills it. Hooking a minnow through the spine instead of the lip or dorsal fin is a classic example.
The Solution: Learn the proper hooking locations for each bait type. For minnows, hook them through the lips for trolling or through the skin just below the dorsal fin for stationary presentations. This keeps them alive and swimming energetically.
Mistake #3: Over-Weighting the Rig
The Problem: Using heavier live bait weights than necessary. This causes the bait to sink unnaturally fast, can drag it into snags, and makes it harder to detect subtle bites.
The Solution: Always use the lightest weight possible that will get your bait to the desired depth and maintain contact with the bottom. Start light and only go heavier if current or wind demand it. This simple tip is one of the most effective live bait rigging tips.
Mistake #4: Ignoring Line Twist
The Problem: A spinning minnow or a poorly tied rig can cause severe line twist. This weakens your line, creates frustrating tangles, and makes your presentation look completely unnatural.
The Solution: Always use a high-quality ball-bearing swivel in your rig. Also, ensure your bait is hooked perfectly straight so it doesn’t spin unnaturally when pulled through the water. This is crucial for all live bait rigging methods.
Mistake #5: Not Matching the Hatch
The Problem: Using a large shiner when the bass are feeding on small shad, or a nightcrawler when fish are keyed in on leeches. Presenting the wrong food source is a recipe for failure.
The Solution: Pay attention to your surroundings. Look for baitfish activity on the surface or in the shallows. If possible, check the stomach contents of the first fish you keep to see what it’s been eating, then adjust your bait choice accordingly.
Advanced Live Bait Rigging Strategies for 2024/2025
As fish face increasing pressure, adapting with more refined and sophisticated approaches is key. These cutting-edge live bait rigging techniques can fool even the most educated fish and give you an edge on the water in 2024 and beyond.
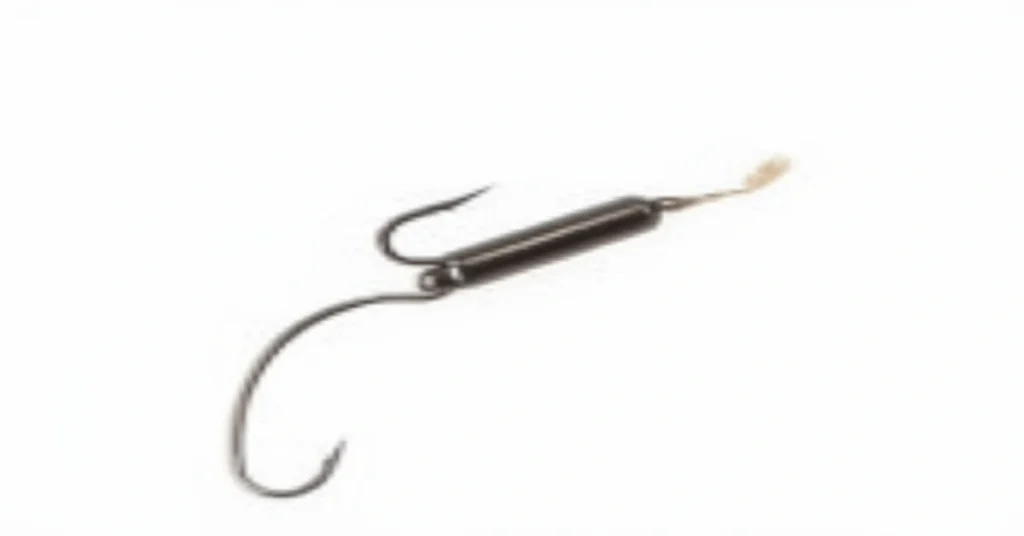
The Stinger Hook Rig
This technique is a lifesaver when targeting notorious short-strikers like walleye, which often grab the tail of a bait and miss the main hook. A stinger rig involves adding a small, secondary treble hook connected to the eye of the main hook by a short piece of monofilament or wire. The stinger hook is then lightly embedded near the tail of the minnow or leech. When a fish strikes short, this trailing hook ensures a solid hook-up. This advanced method within live bait rigging drastically improves your catch rate for finicky biters.
The Slow Death Rig
Originally developed for walleye, the Slow Death rig is an incredibly effective presentation that is gaining popularity for other species. It uses a specially designed, kinked hook (like the Mustad Slow Death hook) that imparts an erratic corkscrew action to the bait, typically a half-nightcrawler. When trolled very slowly (0.8-1.2 mph) behind a bottom bouncer weight, this spinning motion is an irresistible trigger for predators. This is a highly specific live bait rig setup that requires the right components but is deadly when other methods fail.
Essential Tools & Resources for Live Bait Rigging
Having the right gear and knowledge sources makes all the difference. High-quality components and reliable information are the cornerstones of successful live bait rigging.
Recommended Tools:
- High-Quality Live Bait Hooks: Invest in chemically sharpened hooks from reputable brands. They are sharper, stronger, and will significantly increase your hook-up ratio. A good assortment of octopus, circle, and J-hooks is essential live bait tackle.
- Tungsten Live Bait Weights: While more expensive than lead, tungsten weights are smaller for their weight, providing better feel and sensitivity of the bottom. They are also more environmentally friendly.
- Portable Aerator: The number one rule of live bait is to keep it alive. A simple, battery-powered aerator for your minnow bucket or livewell is a non-negotiable tool for maintaining lively, effective bait throughout the day.
Additional Resources:
- Online Fishing Forums: Websites like In-Depth Outdoors or Bass Resource have communities of expert anglers who share real-time information, live bait rigging tips, and reports. They are an invaluable source of current information.
- Detailed Knot-Tying Apps: An app on your phone that provides clear, animated diagrams for tying knots like the Palomar and Improved Clinch is a fantastic resource, especially for beginners refining their live bait rigging basics.
Frequently Asked Questions About Live Bait Rigging
Q1: When starting out, what is the most important part of my live bait rig setups?
Answer: For beginners, the most important element is knot integrity and using the right hook. A perfectly assembled rig is useless if your knot fails. Practice tying the Improved Clinch and Palomar knots until you can do them perfectly. Beyond that, focusing on the correct live bait hooks for your bait size is critical. A small, sharp hook will keep your bait lively and result in more bites than any other single factor within the various live bait rigging methods. Mastering these live bait rigging basics is the first step.
Q2: How do I choose the right leader length and material for my rig?
Answer: Your choice of live bait leaders depends on water clarity and the mood of the fish. As a general rule: use longer (3-6 ft) fluorocarbon leaders in very clear water for wary fish. Use shorter (1.5-3 ft) monofilament or fluorocarbon leaders in stained water or when fishing in heavy cover. Fluorocarbon is less visible and more abrasion-resistant, making it a premium choice, while monofilament has more stretch, which can be forgiving.
Q3: What’s the biggest advantage of a slip-sinker rig over a simple split-shot rig?
Answer: A slip-sinker rig’s main advantage is sensitivity and natural presentation. Because the line can slide freely through the sinker, a fish can pick up the bait and swim off without feeling the weight of the sinker. This is crucial for light-biting or cautious fish. A fixed split-shot rig offers less freedom, and a fish will immediately feel the resistance of the weight, potentially causing it to drop the bait.
Q4: How much weight should I use for my rig?
Answer: The golden rule for live bait weights is to use the absolute minimum amount needed to reach and maintain contact with the bottom or your desired depth. For shallow water (under 15 feet) with little wind or current, a 1/8 to 1/4 oz weight is often sufficient. In deeper water or stronger current, you may need to go up to 1/2 oz, 3/4 oz, or even more. Start light and add weight only if necessary.
Conclusion: Master Live Bait Rigging for Long-term Success
Mastering the art of live bait rigging is a journey, not a destination, but it is one of the most rewarding skills an angler can develop. It moves you beyond simply fishing and into a deeper understanding of fish behavior and underwater ecosystems. The key takeaways are to prioritize bait vitality, match your rig to the conditions, and never stop refining your approach.
As you continue to practice, the various components—from live bait hooks and live bait weights to the nuances of leader material—will become second nature. The future of angling will always have a place for these foundational skills. By applying the live bait rigging techniques and live bait rigging tips in this guide, you are investing in a lifetime of more successful, more enjoyable, and more memorable days on the water.
Related Articles You Might Find Helpful:
- Choosing the Best Live Bait Hooks for Walleye and Bass
- A Deep Dive into Advanced Live Bait Rig Setups
- How to Keep Your Bait Alive Longer: An Angler’s Guide
What’s Your Live Bait Rigging Experience?
What is your go-to live bait rig, and what’s the most memorable fish you’ve ever caught using it? Share your stories and tips in the comments below!
Note: This guide reflects current best practices and is updated regularly to ensure accuracy. Last updated: October 17, 2023