Master Pitching Jigs: Your Ultimate Guide
Ever watched a monster bass ignore every lure you throw, only to see it disappear back into the safety of a thick laydown or dense dock piling? It’s a frustratingly common scenario, but what if you could deliver a perfect presentation right to its doorstep, silently and accurately? This is the power of pitching jigs, a technique that transforms anglers from hopeful casters into surgical strikers. Mastering this skill is a game-changer for anyone serious about catching bigger, smarter fish. This comprehensive guide will break down everything you need to know, from the fundamentals to advanced strategies that will put more fish in your boat.
Consider this your definitive pitching jig guide. We’ll move beyond the basics to explore the subtle nuances that separate the pros from the weekend warriors. You’ll learn the proper mechanics, how to make the right pitching jig selection for any condition, and discover expert pitching jig tips that give you a distinct advantage on the water. By the end, you’ll understand why pitching jigs is one of the most effective methods for targeting trophy-class largemouth, smallmouth, and spotted bass holding tight to cover.
Table of Contents
- What is pitching jigs?
- Key Benefits and Importance
- Complete Step-by-Step Guide
- Expert Tips & Best Practices
- Common Mistakes to Avoid
- Advanced Strategies for 2024/2025
- Essential Tools & Resources
- Frequently Asked Questions
What is pitching jigs?
Pitching jigs is a short-to-medium range casting technique that uses an underhand pendulum motion to deliver a jig with pinpoint accuracy and minimal water disturbance. Unlike a traditional overhead cast, pitching is designed for stealthy entries into tight spaces where big bass hide.
This method is a cornerstone of serious pitching jig fishing. It’s not just about the cast; it’s a complete system that involves specific pitching jig techniques, a deep understanding of pitching jig bass behavior, and the right gear. Success depends on everything from choosing appropriate pitching jig colors and pitching jig sizes to executing flawless pitching jig presentations. Ultimately, the goal is to improve your pitching jig accuracy to drop a lure into a coffee-cup-sized target from 30 feet away, making it an indispensable skill.
Key Components
- The Pendulum Motion: The core of the technique, where you let out line and swing the jig like a pendulum before releasing it towards the target. This provides control over speed and trajectory.
- The Low Trajectory: Pitched lures travel low to the water’s surface, helping them slide under overhanging branches, docks, and other obstacles.
- The Silent Entry: A perfect pitch results in the jig entering the water with a subtle “plop” rather than a loud splash, preventing you from spooking wary fish.
- Line Control: Using your thumb on the baitcaster spool to feather the line allows for precise distance control and immediate bite detection as the jig falls.
Why pitching jigs Matters: Key Benefits
In the world of bass fishing, few techniques are as consistently effective at producing big bites as pitching jigs. While other methods cover water quickly, pitching excels at surgically dissecting high-percentage cover where mature, dominant bass live. It’s a deliberate and strategic approach that often pays off with quality over quantity.
Unmatched Accuracy and Stealth
The primary advantage of pitching jigs is the incredible control it offers. When a big bass is tucked deep under a boat dock or in a tiny pocket within a weed bed, a standard cast is too risky and inaccurate. Pitching allows you to place your lure exactly where it needs to be with a quiet entry that mimics natural prey. This stealth approach is critical for fooling pressured or finicky bass that have seen countless other lures crash down around them. Mastering pitching jig accuracy is the difference between getting a bite and simply spooking the fish of a lifetime.
Targeting Trophy-Class Fish
Big bass are often solitary and prefer the safety of heavy cover—think submerged trees, dense vegetation, and shadowy dock pilings. They don’t typically roam open water. Pitching jigs is the most efficient way to present a bulky, protein-rich meal directly in their strike zone. A well-pitched jig mimics a crawfish or bluegill, two primary forage items for large bass, triggering a predatory response that lighter, finesse presentations might not. This is why so many tournament wins are credited to the art of pitching jigs.
“The pitch is the single most important cast in bass fishing. It lets you put the right bait in the right place, quietly. If you can’t do that, you’re leaving 80% of the biggest fish for someone else to catch.” – Pro Angler Mike Iaconelli (paraphrased)
Complete Guide to pitching jigs – Step-by-Step
Learning the mechanics of pitching jigs can feel awkward at first, but with practice, it becomes second nature. This complete pitching jig guide breaks the process down into three simple, repeatable steps. Focus on a smooth, fluid motion.
Step 1: The Setup and Grip
Proper setup is the foundation of a good pitch. Start by reeling your jig up to within a foot of your rod tip. Then, let out line until the jig is hanging even with your reel. This gives you the ideal amount of line for the pendulum swing. Grip the jig’s hook (carefully) with your non-casting hand and hold the rod around a 45-degree angle pointing towards the water.
- Specific action item: Press and hold the thumb bar on your baitcasting reel to disengage the spool.
- Required tools or resources: A 7′ to 7’6″ medium-heavy or heavy power rod with a fast action tip and a high-speed baitcasting reel.
- Expected outcome: You are in the ready position, with full control of the lure and line, prepared to initiate the swing.
Step 2: The Underhand Pendulum Motion
This is where the magic happens. In one fluid motion, swing the rod tip up from the 45-degree angle to a near-vertical position. As the rod goes up, allow your non-casting hand (holding the jig) to move with it. As the jig swings forward like a pendulum, release it from your hand, aiming it toward your target. The energy for the cast comes from the rod loading and unloading, not a forceful arm movement.
Step 3: The Release and Feathering
As the jig travels towards the target, keep your thumb lightly on the spool. This is called “feathering.” By applying subtle pressure, you can control the distance and prevent backlashes. Just before the jig hits the water, press down firmly with your thumb to stop the spool completely. This action pulls the jig’s tail down, ensuring it enters the water silently and vertically, which is a key component of effective pitching jig presentations.
Expert Tips & Best Practices for pitching jigs
Following best practices will accelerate your learning curve and help you avoid common frustrations. These pitching jig tips are separated for those just starting and those looking to refine their skills. Consistent practice is the key to success in pitching jig fishing.
For Beginners:
- Practice in Your Yard: Set up a bucket or a small target 15-20 feet away. Practice pitching a weight (with the hook removed) until you can consistently land it in the target without a splash. This builds muscle memory for pitching jig accuracy.
- Start Close: When on the water, don’t try to pitch 40 feet right away. Focus on making perfect, silent presentations to targets 10-20 feet from the boat. As your confidence grows, you can increase your distance.
- Use Your Wrist, Not Your Arm: The pitching motion should be a subtle flick of the wrist and a lift of the forearm. Over-using your shoulder and arm will lead to inaccuracy and fatigue.
For Advanced Users:
- Mastering the Skip: A more advanced version of pitching is skipping the jig under low-hanging cover like docks and trees. Use a flatter trajectory and a jig with a broader head design. This technique allows you to reach fish that other anglers can’t.
- Matching the Fall Rate: Pay close attention to how bass react. Sometimes they want a jig to plummet quickly (use a heavier jig), and other times a slow, gliding fall (use a lighter jig or a bulkier trailer) is what triggers a bite. This is an elite-level aspect of pitching jig presentations.
5 Common pitching jigs Mistakes to Avoid
Avoiding common pitfalls is crucial for success. Many anglers struggle with pitching jigs because they develop bad habits early on. Recognizing and correcting these errors will dramatically improve your efficiency and catch rate.
Mistake #1: Making a Loud Entry
The Problem: A loud splash as the jig hits the water is the fastest way to alert a bass to your presence and spook it. This is usually caused by the jig flying too high or landing on its side.
The Solution: Focus on a low trajectory and feathering your spool. Stop the lure’s momentum just before it touches the water to force it to enter vertically and quietly. This is a fundamental part of proper pitching jig techniques.
Mistake #2: Not Watching Your Line
The Problem: Many bites on a jig occur as it falls. If you aren’t intently watching your line where it enters the water, you’ll miss the subtle “tick” or sideways jump that signals a bite.
The Solution: Always be a “line watcher.” As soon as your jig hits the water, keep your eyes glued to the line. Any unnatural movement is your signal to set the hook hard.
Mistake #3: Using the Wrong Rod
The Problem: A rod that’s too short, too light, or has a slow, parabolic action will kill your pitching jig accuracy and hook-setting power. You won’t be able to control the lure or drive the hook home in a bass’s tough mouth.
The Solution: Invest in a dedicated pitching rod. Look for something between 7′ and 7’6″ with a Medium-Heavy or Heavy power and a Fast or Extra-Fast action. This provides the perfect blend of tip sensitivity and backbone.
Advanced pitching jigs Strategies for 2024/2025
As technology and our understanding of bass behavior evolve, so do the strategies for pitching jigs. These cutting-edge approaches can give you a significant advantage, especially on highly pressured bodies of water.
Leveraging Forward-Facing Sonar (FFS)
The rise of FFS like Garmin LiveScope and Lowrance ActiveTarget has revolutionized pitching jig fishing. Instead of pitching to visible cover, you can now pitch to individual fish you see on your screen. This requires supreme pitching jig accuracy, as you’re often leading the fish by a few feet and watching its reaction in real-time. You can adjust your pitching jig presentations on the fly—speeding up or slowing down the fall—to trigger a reaction bite from an otherwise inactive fish.
The “Slack Line” Pitch
This advanced technique is deadly for vertical cover like bridge pilings, standing timber, or steep bluff walls. After your jig enters the water, instead of immediately engaging the reel and creating a pendulum effect back to the boat, you feed it slack line. This allows the jig to fall perfectly straight down, staying in the strike zone along the cover for the entire water column. This presents a more natural profile and is highly effective for targeting suspended pitching jig bass.
Essential Tools & Resources for pitching jigs
Having the right equipment is non-negotiable for effective pitching. Your gear is a system where each component plays a critical role in performance. This is the ultimate tool list for your pitching jig selection.
Recommended Tools:
- Pitching Rod (7′ to 7’6″ MH/H Fast): A rod with a fast action tip allows for accurate casting, while the heavy backbone provides the power to pull big bass from thick cover. Brands like St. Croix, G. Loomis, and Dobyns offer excellent pitching-specific models.
- High-Speed Baitcasting Reel (8:1:1+ ratio): A high-speed reel allows you to pick up slack line quickly after a pitch, which is crucial for getting a solid hookset and bringing a fish out of cover before it can wrap you up.
- Fluorocarbon Line (17-25 lb): Fluorocarbon is nearly invisible underwater, has low stretch for sensitivity and powerful hooksets, and offers excellent abrasion resistance for fishing around wood, rock, and docks.
Additional Resources:
- YouTube Pro Angler Channels: Watch channels from professional anglers like Jacob Wheeler, Scott Martin, and Greg Hackney. They often provide invaluable pitching jig tips and show real-world applications of different techniques.
- Online Fishing Forums: Websites like BassResource.com have dedicated forums where you can ask questions and learn from a community of experienced anglers about everything from pitching jig colors to specific presentations.
Frequently Asked Questions About pitching jigs
Q1: How do I improve pitching jig accuracy and choose the best pitching jig presentations?
Answer: Improving pitching jig accuracy comes down to practice and muscle memory. Start by practicing in your yard with a bucket. Focus on a fluid, underhand motion driven by your wrist, not your arm. For pitching jig presentations, let the cover and fish’s mood dictate your approach. For wood, a slow drag or a few short hops is effective. In grass, “popping” the jig free can trigger reaction strikes. Always let the jig fall on a semi-slack line to detect bites on the initial drop.
Q2: What is the difference between pitching and flipping?
Answer: They are both short-range, underhand techniques, but they differ in line management. When pitching, you cast the lure by releasing it from your hand and letting line out from the reel. When flipping, you pull line off the reel with your hand and use a pendulum swing to drop the lure, never disengaging the reel. Flipping is for very close targets (less than 15 feet), while pitching is for targets from 15 to 40 feet away.
Q3: What determines the best pitching jig sizes and pitching jig colors to use?
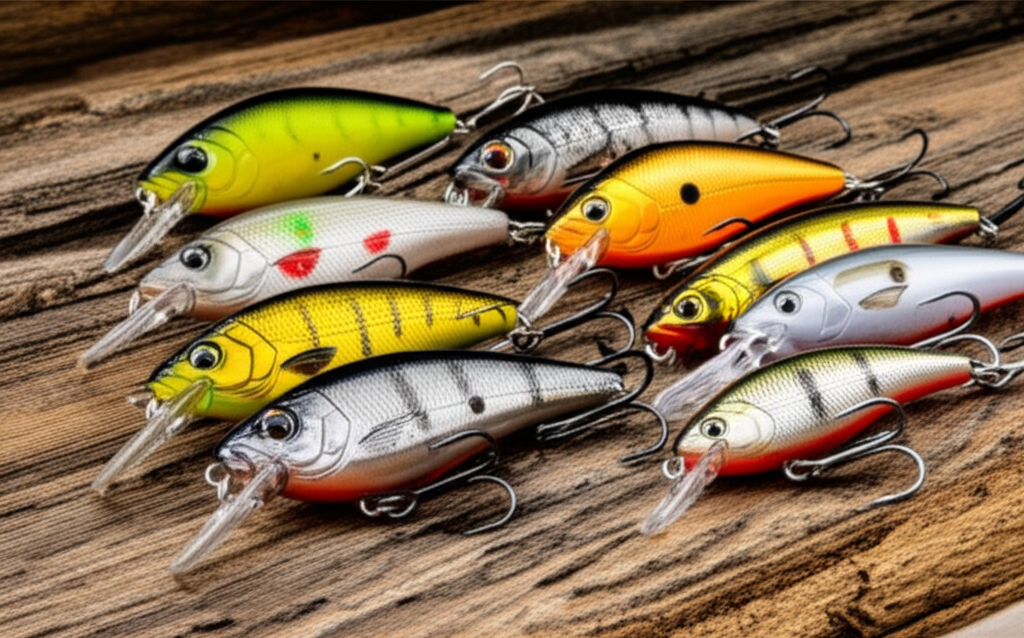
Answer: Water clarity and local forage are the two biggest factors. For pitching jig sizes, start with 3/8 oz for general use, go up to 1/2 oz or 5/8 oz for deeper water or thicker cover, and down to 1/4 oz for a slower fall. For pitching jig colors, use natural colors like Green Pumpkin, Brown, or Black/Blue in clear to stained water. In muddy water, high-contrast colors like Black/Blue, Black/Red, or Junebug are more visible and often perform better.
Q4: What’s the most important part of a good hookset when pitching jigs?
Answer: The most important part is reeling down to remove any slack before you swing. When you feel a bite, quickly reel until you feel the weight of the fish, then set the hook with a powerful upward sweep of the rod. Setting the hook on a slack line will result in a poor hookup and lost fish nearly every time. This is a critical skill for landing pitching jig bass.
Conclusion: Master pitching jigs for Long-term Success
Mastering the art of pitching jigs is an investment in your angling success that pays dividends for a lifetime. This technique is more than just a cast; it’s a strategic approach that unlocks access to the biggest, most reclusive bass in any body of water. By focusing on a silent entry, pinpoint accuracy, and the right presentation, you can consistently catch fish that other anglers miss.
As you continue your journey in pitching jig fishing, remember that every detail matters. From refining your pitching jig techniques and dialing in your pitching jig selection to understanding how pitching jig colors and sizes impact your success, continuous improvement is key. The skills detailed in this pitching jig guide will not only help you catch more fish today but will also provide a foundation for adapting to new challenges and technologies for years to come.
Related Articles You Might Find Helpful:
- A Deep Dive into Pitching Jig Bass Behavior in Summer
- How to Choose the Perfect Jig Trailer for Any Condition
- Flipping vs. Pitching: When and Where to Use Each Technique
What’s Your pitching jigs Experience?
What’s your go-to jig and trailer combination for pitching heavy cover? Share your favorite setup or a success story in the comments below!
Note: This guide reflects current best practices and is updated regularly to ensure accuracy. Last updated: 10/24/2023